Page 1 of 1
Caulking?
Posted: Wed Mar 28, 2007 7:07 pm
by skater
Looks like my Fantastic Fan has a leak - I have the bunk mattresses out because I was cleaning the covers, and I noticed the wood of the bunk got a few drops.
I was just going to climb up there with regular household caulk and put a bead around the base of the fan on the roof. Is it that simple or am I missing something important?
Posted: Wed Mar 28, 2007 7:59 pm
by Alaskan
Its seldom that easy....usually you'll find the existing caulking all crinkled up and in need of removal.
Best way is the remove all the old crap and start over....
The best sealer btw is 3M 5200, widely use in the marine industry...can be found at Ace Hardware.... not the cheapest but it will last longer. Get the fast dry version
Posted: Wed Mar 28, 2007 8:49 pm
by skater
D'oh.
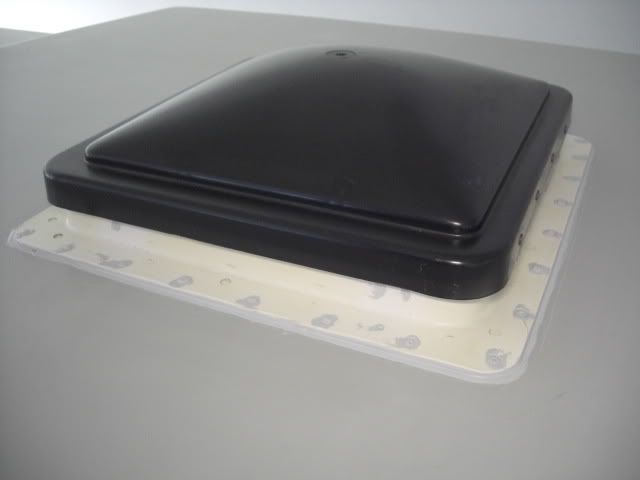
My bathroom fan is leaking occasionally, too, but I think that's because the plastic top is cracked, rather than a leak around the side. Of course the sealant on that probably isn't in any better shape than the fan...
Posted: Sun May 20, 2007 9:05 pm
by Alaskan
RJ....the replacement top for the shower fan is about $10 and made by Ventline which makes many of the exterior pieces on our B190's
Posted: Mon May 12, 2008 7:24 pm
by skater
Well I never did this repair. And I'm paying for it now - with the 7 inches (or so) of rain we've gotten since Thursday night, it was leaking and got my mattresses and a couple blankets wet. I now have some buckets in there catching the water.
For the roof, I asked at the local RV place, and they recommended
Dyco 20/20. Looks like I can just brush it on.
Now to figure out how to get the old stuff off... I'll have to climb up there and see if I can scrape it off relatively easily. I hope so...
Posted: Fri May 23, 2008 3:27 pm
by skater
Well, it's done! It was actually fairly easy to do - the old stuff was still pliable (cracked and broken, but pliable). Took me about two hours. And, of course,
here's the writeup and pictures (you knew that was coming, right?

).
I did find that the original installer had overtightened some of the screws and broke the plastic.

Posted: Thu Apr 22, 2010 1:24 pm
by Alaskan
Posted: Tue Sep 28, 2010 12:55 pm
by jlidahoair
In reference to the resealing of top vents etc. I did that first thing when we got our B-Van. Our vents had been resealed with a black sticky sealant. I decided to take the plunge and use a product we've used on the roof of our Beaver, called "Pro Guard Liquid Roof" Supposedly the world's only epdm rubber in a liquid form. (Per the can..;o) The first time I purchased a gallon for the Beav' from the manufacturer, this time I only needed a small ammt. and got a quart from CW. $65 including shipping. Not cheap, but it does work, per my experience on the Beaver vents, AC, Skylight, etc. I just sealed around each vent, etc. except the ac on our BVan. Only problem with this product is that you have to mix the catalyst at the start, wait 45 min to an hour, then start sealing. (it has a long working time)To save any for later you have to refrigerate it to stop the curing process (stops at below 50 degrees), use it all up, or chuck what's left in the trash. To bad a couple guys couldn't decide to seal at the same time to use it all up. Ha. This product has a 5 yr. warranty. You can check it out on the pro guard site as well as CW.
Good luck.. Keep Dry ;o)
Posted: Tue Sep 28, 2010 1:47 pm
by Alaskan
OUCH on that price J...
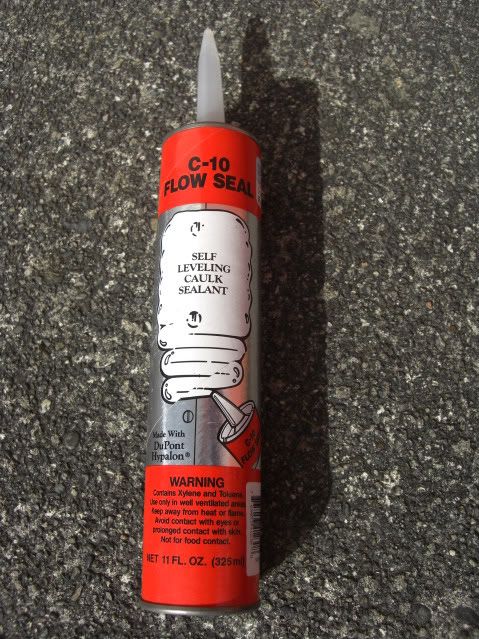
You can't beat this RV industry product....under 10-buck a tube and a single tube will do all the locations on-top-of a B190
Its important to remove all the old sealer products that have been applied previously regardless of what sealers you choose.
Caulking & Sealing thread:
http://b190.com/modules.php?name=Forums ... opic&t=302
 Take the time to REMOVE all the layers of old sealer...!
And...the results are seen below..
Take the time to REMOVE all the layers of old sealer...!
And...the results are seen below..
Posted: Tue Sep 28, 2010 8:54 pm
by jlidahoair
Yup, I did spend a bundle on the sealant that I bought, but I didn't have such a wonderful site as this to check things out on then. The product I bought did a fantastic job though, but it ought to at that price, right.. Ha, Ha. I knew about the self leveling caulk, but on the sealing job I did, I wanted a paint on prod. because I needed to cover the black gook (which actually sealed good, kind of, but looked bad.) that didn't scrape off... Just my take. ;o)
I'm glad I found this site. I will be able to see the pros and cons of what works and doesn't, and do accordingly. Thanks for sharing the info Skater. I'll tuck that away in the remaining memory banks. ;o)
J.
Re:
Posted: Wed May 09, 2012 10:14 am
by liferiders
skater wrote:Well, it's done! It was actually fairly easy to do - the old stuff was still pliable (cracked and broken, but pliable). Took me about two hours. And, of course,
here's the writeup and pictures (you knew that was coming, right?
).
I did find that the original installer had overtightened some of the screws and broke the plastic.
Can you please make this link work? For some reason, it gives an error. My B190 has a small leak. The leak is through one of those tiny screw holes which holds the rails around the edge at the top. Not sure how to deal with this one. The side rail is attached to the roof real solid, but just one the connector came off. I will post a picture of it soon.
Re: Re:
Posted: Wed May 09, 2012 11:22 am
by skater
liferiders wrote:skater wrote:Well, it's done! It was actually fairly easy to do - the old stuff was still pliable (cracked and broken, but pliable). Took me about two hours. And, of course,
here's the writeup and pictures (you knew that was coming, right?
).
I did find that the original installer had overtightened some of the screws and broke the plastic.
Can you please make this link work? For some reason, it gives an error. My B190 has a small leak. The leak is through one of those tiny screw holes which holds the rails around the edge at the top. Not sure how to deal with this one. The side rail is attached to the roof real solid, but just one the connector came off. I will post a picture of it soon.
Hmmmm...I'll have to look for that article. I thought I brought them all over to this site, but now I don't see it. I will say I gave up after it still leaked on the third try, and I took it to a shop, who cleaned off all of the stuff I'd used and sealed it perfectly.