Short version: It's a straightforward job, but it's not for those with sensitive stomachs.
Dump valve replacement...
-
skater

- Site Admin
- Posts: 2570
- Joined: Thu Mar 08, 2007 1:00 am
- B190 Year: 1991
- WBCCI: 13270
- Location: Annapolis, MD
Dump valve replacement...
Well, here's a job no one looks forward to. I just did mine and wrote up a summary of the directions here.
Short version: It's a straightforward job, but it's not for those with sensitive stomachs.
Short version: It's a straightforward job, but it's not for those with sensitive stomachs.
1991 Airstream B190 - bought, 2005; sold, 2011; bought 2017
1995 Airstream Excella 30' trailer
WBCCI #13270, Washington, DC Unit
1995 Airstream Excella 30' trailer
WBCCI #13270, Washington, DC Unit
-
skater
- Site Admin
- Posts: 2570
- Joined: Thu Mar 08, 2007 1:00 am
- B190 Year: 1991
- WBCCI: 13270
- Location: Annapolis, MD
Definitely agree! But I'm happy to say that I'm not getting any leakage at all now. It's nice not having waste sitting there when I pop off the sewer cap.brenda wrote:just replaced mine this past weekend,what a crap job!!!
1991 Airstream B190 - bought, 2005; sold, 2011; bought 2017
1995 Airstream Excella 30' trailer
WBCCI #13270, Washington, DC Unit
1995 Airstream Excella 30' trailer
WBCCI #13270, Washington, DC Unit
-
craigmar

- Seasoned Traveler
- Posts: 136
- Joined: Mon Mar 26, 2007 12:00 am
- B190 Year: 1991
- WBCCI: 0
- Location: Salt Lake City, Utah
dump valve replacement
Finally replaced the dump valves today since I let one of my daughters borrow the van over the weekend and I guess she bottomed the assembly out, just a small drip but steady and so I thought why not. I read the above comments a while back when they were posted and wasn't looking forward to the job but made sure that after dumping the tanks from the weekend stuff, I just filled both tanks a couple of more times with fresh water and dumped em until they ran clear, I left the valves open and drove about fifty or so feet to make sure they were empty of water, closed em and then drove home. During the removal there were about 10 drips of clear water and that was it, after the valves were taken off, I was pleasantly suprised because there was no odor of any kind and the expected unplesant task was actually easier than some of the other repairs and not messey at all except for gluing a peice of 3" pipe and getting the glue on my fingers, I Know, that's what rubber gloves are for, anyway I think if you have to replace the assembly, it pays to make sure you rinse the tanks a few times and make sure they are running clear then you shouldn't have a problem, at least with foul odors.
-
Alaskan

- Site Admin
- Posts: 814
- Joined: Wed Mar 21, 2007 12:00 am
- B190 Year: 1999
- WBCCI: 0
- Location: Alaska and Washington
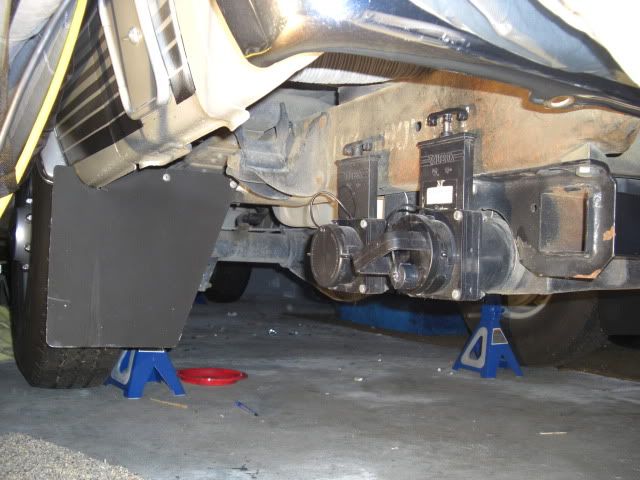
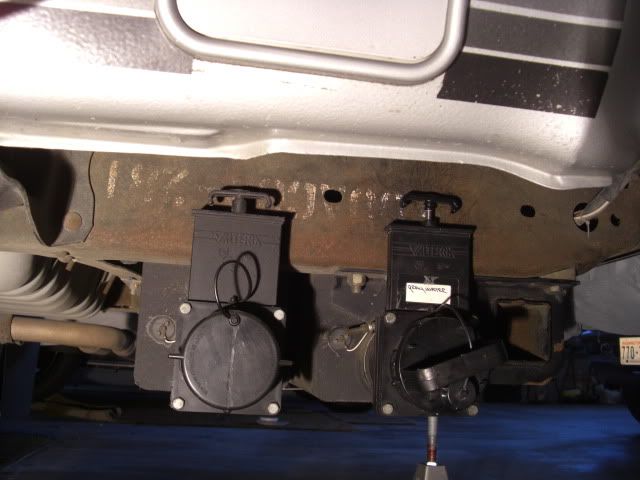
On my 1991 I took that entire dump valve assembly completely apart and separated them and redid did the system there to get it up higher..
All that "junk" hangs down so far its very vulnerable to damage, especially now that our rigs don't sit as high in the rear as they did when new...
On the gray water dump valve as you can see (rear valve) I used a cap with the garden hose outlet as it can easily be emptied in a number of places.

And....if you have a 1997 or newer here is the modification I did
Click this link to another post in the Plumbing Forums
http://b190.com/modules.php?name=Forums ... opic&t=488
All that "junk" hangs down so far its very vulnerable to damage, especially now that our rigs don't sit as high in the rear as they did when new...
On the gray water dump valve as you can see (rear valve) I used a cap with the garden hose outlet as it can easily be emptied in a number of places.
And....if you have a 1997 or newer here is the modification I did
Click this link to another post in the Plumbing Forums
http://b190.com/modules.php?name=Forums ... opic&t=488
-
craigmar
- Seasoned Traveler
- Posts: 136
- Joined: Mon Mar 26, 2007 12:00 am
- B190 Year: 1991
- WBCCI: 0
- Location: Salt Lake City, Utah
Modification
I like what you did. Probably I will try something like that the next time one of the daughters brings it back broken. I had to replace the whole shabang as the bottom half of the black water valve was toast. not a bad job and it took longer to get the parts than to put it back together.