Hot Water Tank replacement...
Posted: Sun Aug 19, 2007 3:36 pm
Recently did a tank only replacement....they refer to it as a re-line
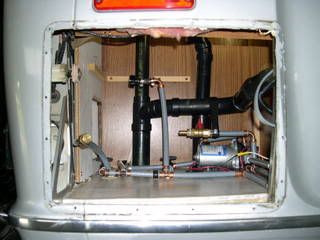
Note... This job is much much easier if you remove the floor section above the hot water tank in the hanging closet...!
Atwood Part # 91642 (GH6-4E)
Re-line $150 vs. complete replacement $450/$600 plus depending on the type of ignition you choose...
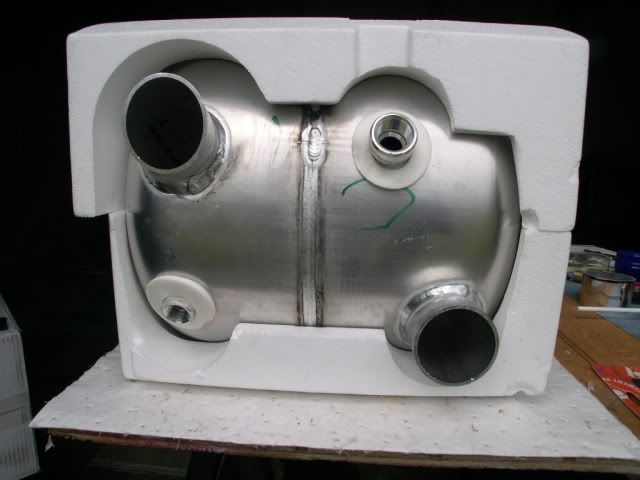
The re-liner kit consists of a new aluminum tank, now with a styrafoam insulation box, a new brass safety pop-off valve and 2 new steel rings that hold the pan to the tank...
The flame enters the bottom there on the right and exits at the top left...these are the 2 fittings where the rings fit over to hold the pan to the tank....these are All that holds those 2 main sections together..
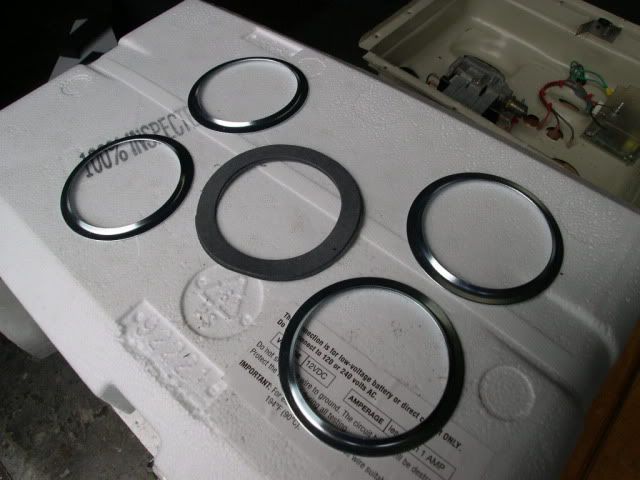
These retainer rings hold the face-plate to the tank itself..
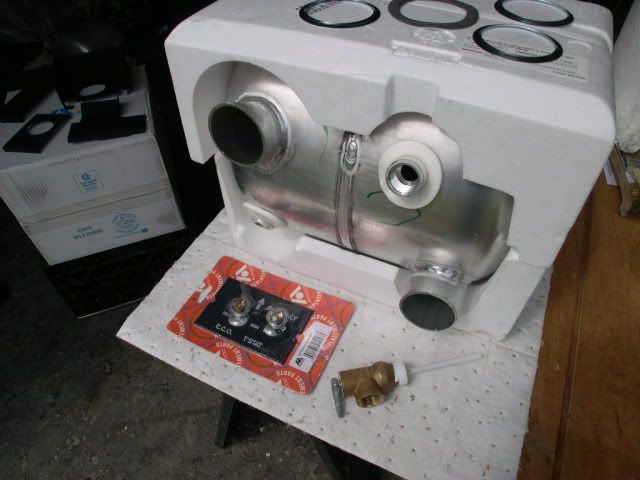
Rear view of replacement tank with the styrafoam container...(you will not be using that tube assemble)

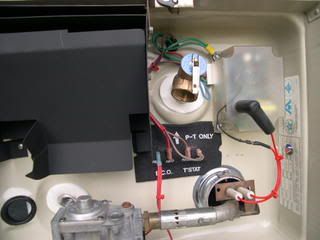
New safety pop-off valve & new temperature control units..
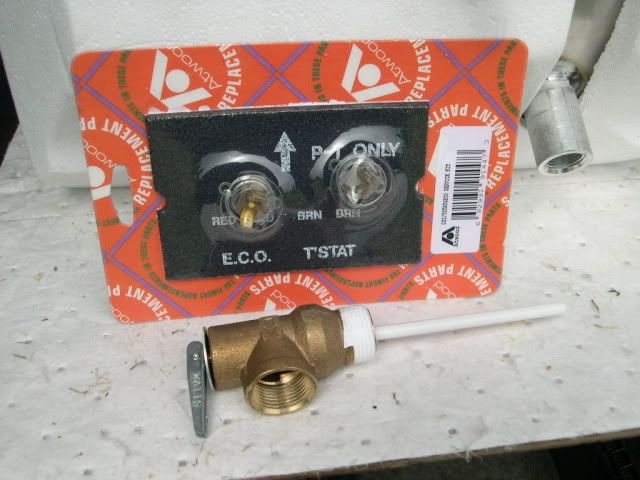
The card there (above) doesn't come in the kit...these are the 2 temp control units, one turns the tank on when the temp drops to a certain point and of coarse the other turns the flame off when the temp reaches a pre-set temperature .... as one of mine had a damaged electrical terminal I replaced them...$12.00 Atwood 91447 (DSI/TSTAT&ECO Service Kit)
Our hot water tanks don't last forever as they are aluminum. Corrosion or electrolysis will eventually get to them and they will begin to leak, usually you will see evidence of this first on the back of the tank as the cardboard covering will show stains or you'll see water on the floor of that compartment.
Its important to have an anode (zink) in our drain plug to prevent electrolysis...which eats holes in the aluminum tank over time...
So.....you can buy a complete new unit at about $450/$600 or you can do a re-line as the rest of the pieces don't wear out...
Removing the unit is very easy, 2 water lines on the back, propane line in the front (be sure to turn your propane tank valve OFF) and 20 screws outside and the unit slides right out.....as you slide the unit out you'll be able to disconnect the wiring.
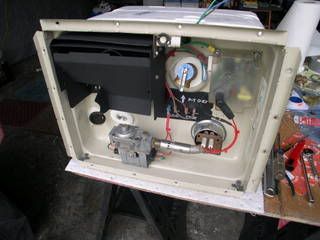
Once removed the next step is to remove that front pan from the aluminum tank itself.
Remove the brass safety valve...you won't be re-using it as the re-line kits comes with a new one. Next remove the exhaust shielding.
You'll now see 2 round aluminum pieces about 2 1/2" in diameter, one at 11 o'clock and the other at 5 o'clock, these are actually part of the aluminum tank....around these 2 pieces you'll see a steel ring. These rings need to be removed, best done by cutting them with a dremel tool...once these two rings are removed you can separate the face plate (called a pan) from the aluminum tank....the hard part is behind you. The reline kit provides you with new replacement rings..
I made a little tool from a piece of aluminum tubing to use to install the new retainer rings on straight..
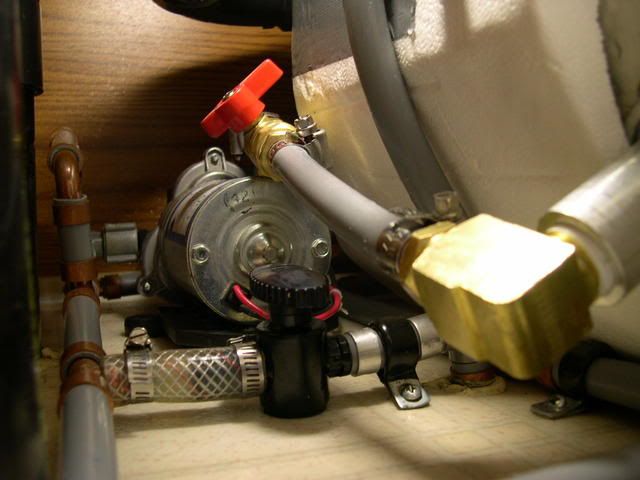
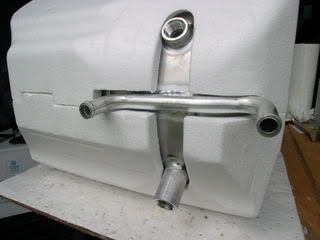
Unit removed from Airstream...
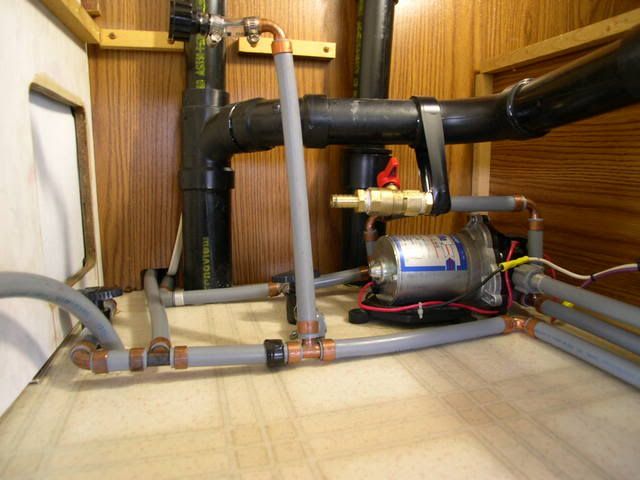
NOTE... water input shut-off ball valve now installed, red handle)
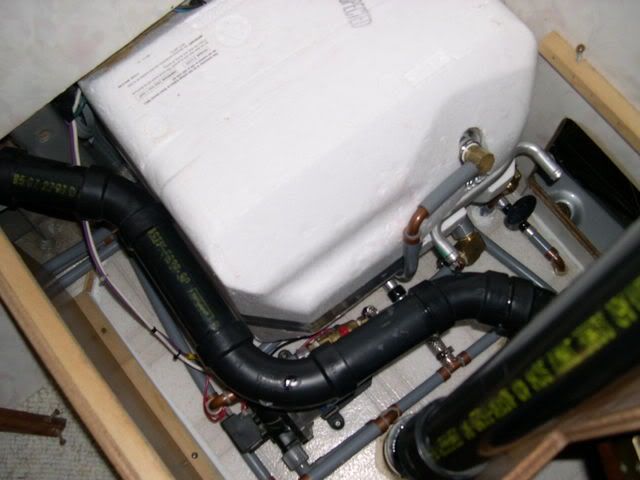
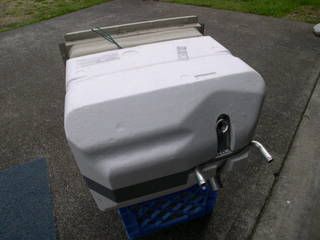
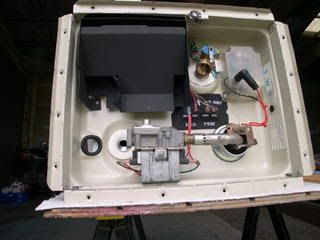
Ready to be installed back into its compartment...
A replacement tank has an option that the old unit didn't have, and because our hot water tanks are located at the rear you wouldn't consider
using that option.
There is a tube here (below) that would also allow you to run water hoses to the unit that would include the hot water heater into your vehicles cooling system as another way to heat the water or to keep it while while traveling...
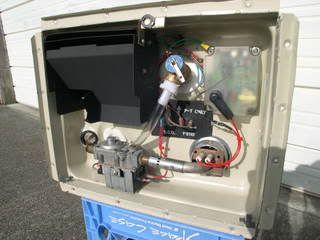
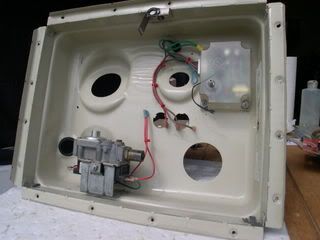
This is the front pan when separated from the aluminum tank...
This is the ORIGINAL front pan....
Made a little tool from a piece of aluminum tube to help install those steel rings straight and get them in tight against the pan...
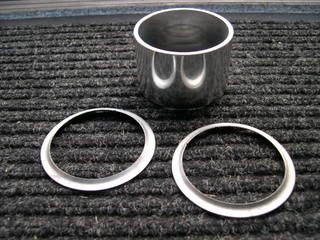
Here is a closer view of the steel ring that holds the pan into the tank...down there in the lower right where the flame enters the tank, the other ring is behind the exhaust shield up in the opposite corner...
One of the 2 retainer ring at lower right..and the other would be behind the black exhaust cover at upper left...very easy to install, especially with a piece of tubing the correct size to use as a driver.
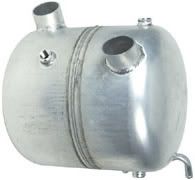
Here is a better picture of the tank itself. The steel rings fit tightly over those 2 welded fitting on the tank..
Note... This job is much much easier if you remove the floor section above the hot water tank in the hanging closet...!
Atwood Part # 91642 (GH6-4E)
Re-line $150 vs. complete replacement $450/$600 plus depending on the type of ignition you choose...
The re-liner kit consists of a new aluminum tank, now with a styrafoam insulation box, a new brass safety pop-off valve and 2 new steel rings that hold the pan to the tank...
The flame enters the bottom there on the right and exits at the top left...these are the 2 fittings where the rings fit over to hold the pan to the tank....these are All that holds those 2 main sections together..
These retainer rings hold the face-plate to the tank itself..
Rear view of replacement tank with the styrafoam container...(you will not be using that tube assemble)
New safety pop-off valve & new temperature control units..
The card there (above) doesn't come in the kit...these are the 2 temp control units, one turns the tank on when the temp drops to a certain point and of coarse the other turns the flame off when the temp reaches a pre-set temperature .... as one of mine had a damaged electrical terminal I replaced them...$12.00 Atwood 91447 (DSI/TSTAT&ECO Service Kit)
Our hot water tanks don't last forever as they are aluminum. Corrosion or electrolysis will eventually get to them and they will begin to leak, usually you will see evidence of this first on the back of the tank as the cardboard covering will show stains or you'll see water on the floor of that compartment.
Its important to have an anode (zink) in our drain plug to prevent electrolysis...which eats holes in the aluminum tank over time...
So.....you can buy a complete new unit at about $450/$600 or you can do a re-line as the rest of the pieces don't wear out...
Removing the unit is very easy, 2 water lines on the back, propane line in the front (be sure to turn your propane tank valve OFF) and 20 screws outside and the unit slides right out.....as you slide the unit out you'll be able to disconnect the wiring.
Once removed the next step is to remove that front pan from the aluminum tank itself.
Remove the brass safety valve...you won't be re-using it as the re-line kits comes with a new one. Next remove the exhaust shielding.
You'll now see 2 round aluminum pieces about 2 1/2" in diameter, one at 11 o'clock and the other at 5 o'clock, these are actually part of the aluminum tank....around these 2 pieces you'll see a steel ring. These rings need to be removed, best done by cutting them with a dremel tool...once these two rings are removed you can separate the face plate (called a pan) from the aluminum tank....the hard part is behind you. The reline kit provides you with new replacement rings..
I made a little tool from a piece of aluminum tubing to use to install the new retainer rings on straight..
Unit removed from Airstream...
NOTE... water input shut-off ball valve now installed, red handle)
Ready to be installed back into its compartment...
A replacement tank has an option that the old unit didn't have, and because our hot water tanks are located at the rear you wouldn't consider
using that option.
There is a tube here (below) that would also allow you to run water hoses to the unit that would include the hot water heater into your vehicles cooling system as another way to heat the water or to keep it while while traveling...
This is the front pan when separated from the aluminum tank...
This is the ORIGINAL front pan....
Made a little tool from a piece of aluminum tube to help install those steel rings straight and get them in tight against the pan...
Here is a closer view of the steel ring that holds the pan into the tank...down there in the lower right where the flame enters the tank, the other ring is behind the exhaust shield up in the opposite corner...
One of the 2 retainer ring at lower right..and the other would be behind the black exhaust cover at upper left...very easy to install, especially with a piece of tubing the correct size to use as a driver.
Here is a better picture of the tank itself. The steel rings fit tightly over those 2 welded fitting on the tank..