As far as I know all the B190's came with Atwood....
Kyle....for a good look at all the details and front and rear views of the water heater installation look in this other thread.
I put in lots of pictures. Also some rear views of the tank installed
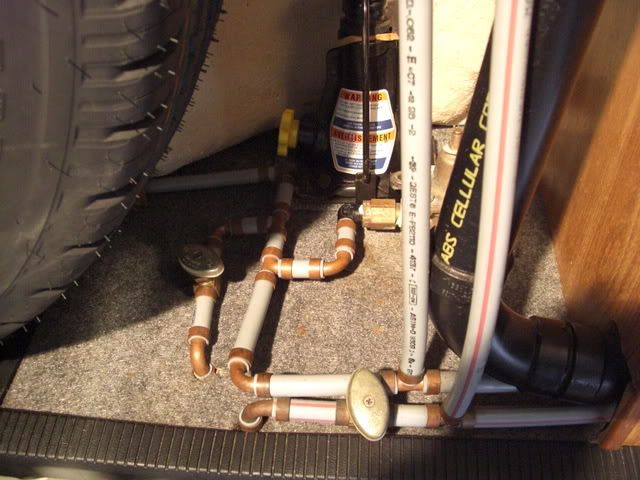
In this thread below note the red-handle ball valve I installed to be able to isolate the hot water tank....
http://b190.com/modules.php?name=Forums ... opic&t=133
The hose barb with the clear plastic hose attached will serve the purpose skater mention but I actually put that on because during the process of these water tanks going from totally cold to the point they are hot and the electronics shut the flame off the brass pop-off valve will always weep some water out...thats even mentioned in the paperwork that comes with a new pop-off valve...therefore you can have water dropping down on the temp controls and electrical wires...not good
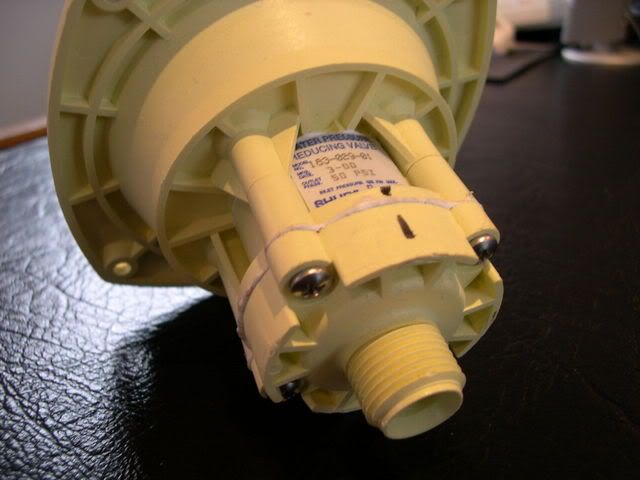
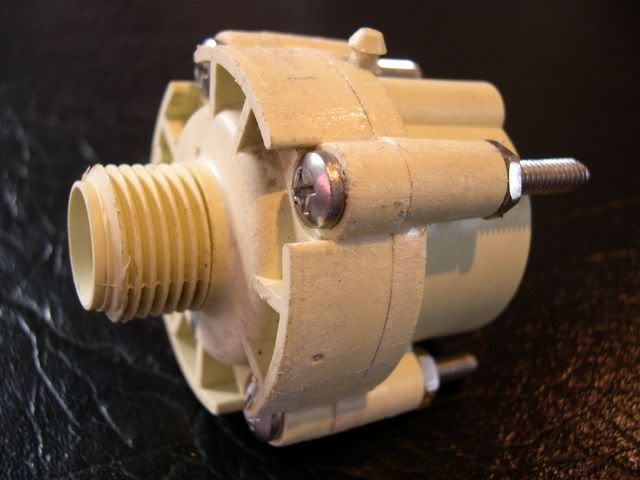
Kyle....I suggest you purchase a new 6 gallon DSI Atwood (without the 120 volt option) do your homework so you don't pay too much....these things are on eBay from Dealers all the time at 40% off....along with other items like our furnaces also..
In addition....on all of these
new Atwoods you'll see they come with a aluminum tubular piece welded to the rear of the tank where the tank can have water lines ( like heater hoses) hooked to them from the vehicles engine to help keep the water hot while traveling.....thats not something you'd want to attempt to do with these water heaters located in the rear.
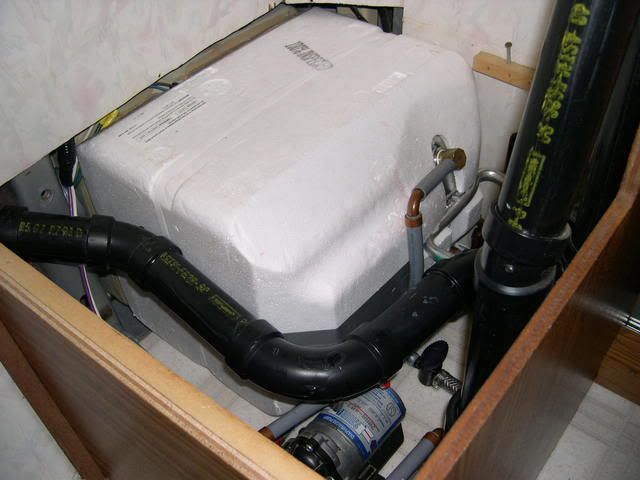
Our rigs use a gray plastic flexible water line material and all the joints have copper crimped clamps....this material is designed to handle high pressure. Once you've cut these clamps at the tanks (2) about the only replacement is regular stainless hose clamps, I found it difficult to get these tight enough to not leak a little....by the time I got done with that project I wished I had purchased the crimping tool and the copper clamps to put back on....I may still do that as I don't trust the hose clamps as they are not designed to be used on the hard gray plastic tubing.
DO NOT use any hose in your installation, not even the type that has the nylon braid in it....it will not withstand the pressure, especially on the HOT OUT fitting on the tank
One other thing that comes into play here thats important...as the hot water tank goes from COLD to HOT the line pressure increases a lot and thats when you'll have leaks.
During that 20-30 time period I try to crack a faucet to let that pressure off the system
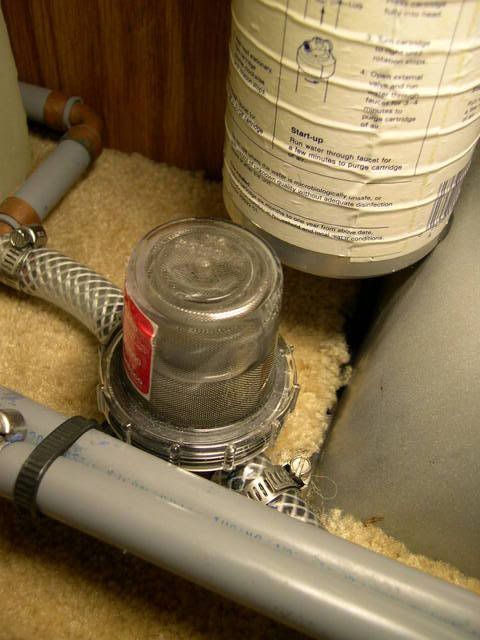
Other than the back of the hot water tank, due to those 2 new clamps, the first 2 places you look for water leaks is the little in-line water filter down mounted to the floor under the sink (next to the fresh water tanks in most of our rigs 1990-1996)....that filter has a small piece of clear plastic hose on each side of it with hose clamps and it loves to leak when the line pressure is high due to the heat-up cycle of the hot water tank.
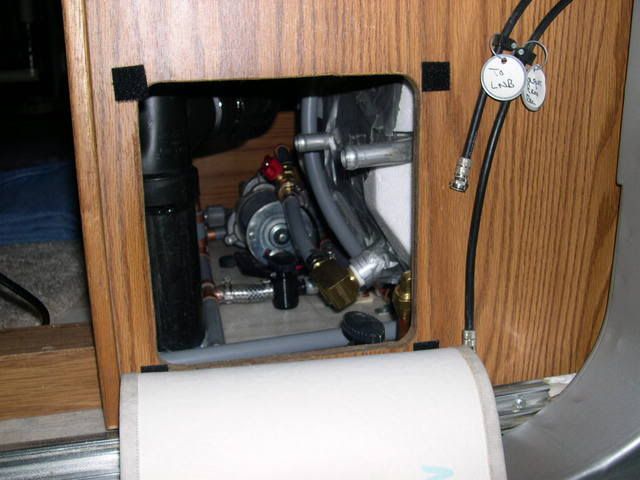
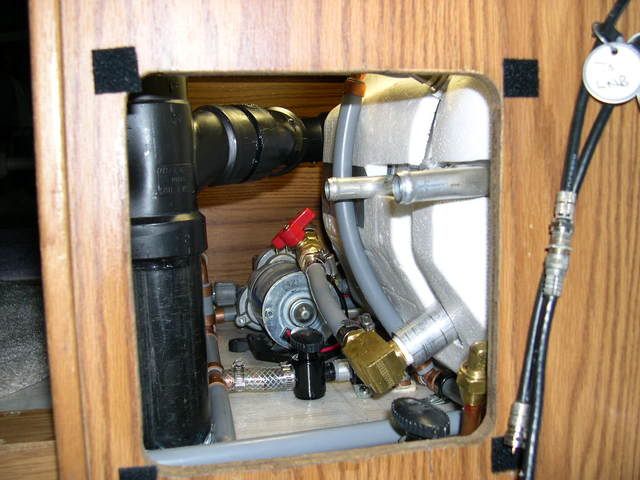
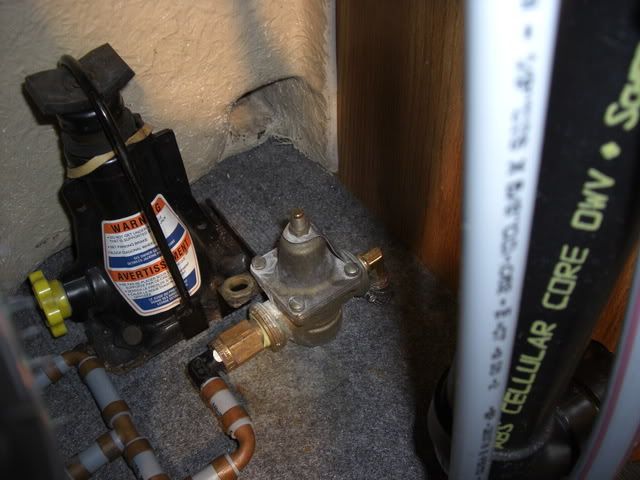
The other location to look for a leak is the back side of the city-water hookup, this unit is also a pressure reducer to reduce city water (sometimes as high as 65 psi down to 40 spi I believe) ....open the left-hand back door and look in there with a flashlight, you'll see that same gray plastic running to the back of the unit.
These plastic units are a poor design and there isn't anything better to replace them with. I've had them apart, tried sealer, made a gasket, put in an o-ring, and finally got them to stop leaking by super-gluing them together
1997 and newer B190's do not have that unit....they have a very nice brass unit mounted to the right of the spare behind the rear doors
The concern here for these small water leaks that you wouldn't normally notice is they create black mold....I've dealt with that shit twice and you don't want any of that.
The installation of a new tank is pretty simple actually...the only difficult area is working through that small access hole in the rear to hook up the lines and work in there. I made that opening somewhat larger but also ended up removing the small floor section in the closet which gives you perfect access to working on the tank installation.....look at those pictures, the very last picture over there will give you a view with the closet floor removed, which makes working in there much easier
PICTURES TOMORROW....Stay Tuned Do either of the two brands have anything special that make them unique? Just want to make sure I get the biggest bang for the tight buck!!!